Category Archives: Digital Voice
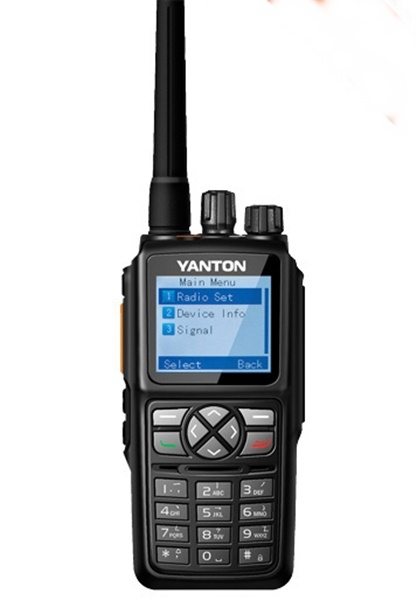
Yanton DM-980
Meer informatie vind je hier!
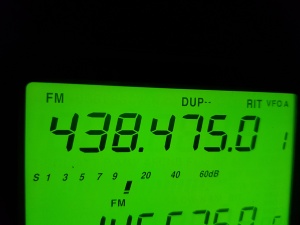
PI1NOS is QSY naar 438.475MHz
Bron: hobbyscoop.nl
 Twee weken geleden werd Stichting Scoop Hobbyfonds benaderd door enkele amateurs die enthousiast gebruiker zijn van onze System Fusion repeater PI1NOS. Zij kwamen met de mededeling dat storing ondervonden werd van een andere gebruiker op de ingangsfrequentie 430.850MHz, namelijk PI1CJP in Blaricum. Beide systemen liggen slechts op 7 kilometer afstand van elkaar. Enige verbazing bestond hierover binnen Hobbyscoop, immers, het is bij een vergunde frequentie van 438.450MHz door het Agentschap Telecom geadviseerd (maar niet verplicht) om een offset van -7,6MHz te gebruiken.
De oorzaak is wel goed aanwijsbaar: Sinds de activering van de nieuwe “gedragslijn vergunningen voor radiozendamateurs” per 1 april 2017 heeft het Agentschap Telecom in principe niet langer ingangsfrequenties gekoppeld aan de vergunde zendfrequentie. In de basis is iedere vergunninghouder dus vrij om een ingangsfrequentie naar keuze te hanteren. Inmiddels is het inzicht ontstaan dat dit tegen verschillende praktische bezwaren stuit omdat soms onlogische combinaties ontstaan op ongewenste frequenties. Daarnaast werkt de nieuwe regeling potentieel ondoelmatig frequentiegebruik in de hand. Agentschap Telecom krabt zich momenteel achter haar oren en heroverweegt de vrije ingangskeuze, wordt vervolgd…
In het geval van PI1CJP gaat het om een D-star hotspot die al meerdere jaren op de frequentie 430.850MHz QRV is. Dat hebben we helaas over het hoofd gezien. Het bandsegment 438.400MHz tot 438.500MHz is per 1-4-2017 extra beschikbaar gekomen, tot dat moment heeft zich dus nooit een potentieel probleem voorgedaan. De beheerder van PI1CJP is ene Jan, PA3CJP. Per e-mail is kort na de ontdekking van de onderlinge interferentie contact met hem opgenomen nadat we hierover door het Agentschap Telecom in de communicatiewisseling zijn betrokken. Duidelijk is geworden dat PA3CJP erg gesteld is op ‘zijn’ frequentie. Hobbyscoop daarentegen heeft geen enkele moeite met het wijzigen van de QRG, we hebben wel voor hetere vuren gestaan 🙂
Dankzij de welwillendheid van het Agentschap Telecom is daarom in overleg besloten dat PI1NOS vanaf heden QRV zal zijn op 438.475MHz met een shift van -7,6MHz. Alle overige instellingen blijven ongewijzigd. Kijk op de systeempagina van PI1NOS voor meer informatie!
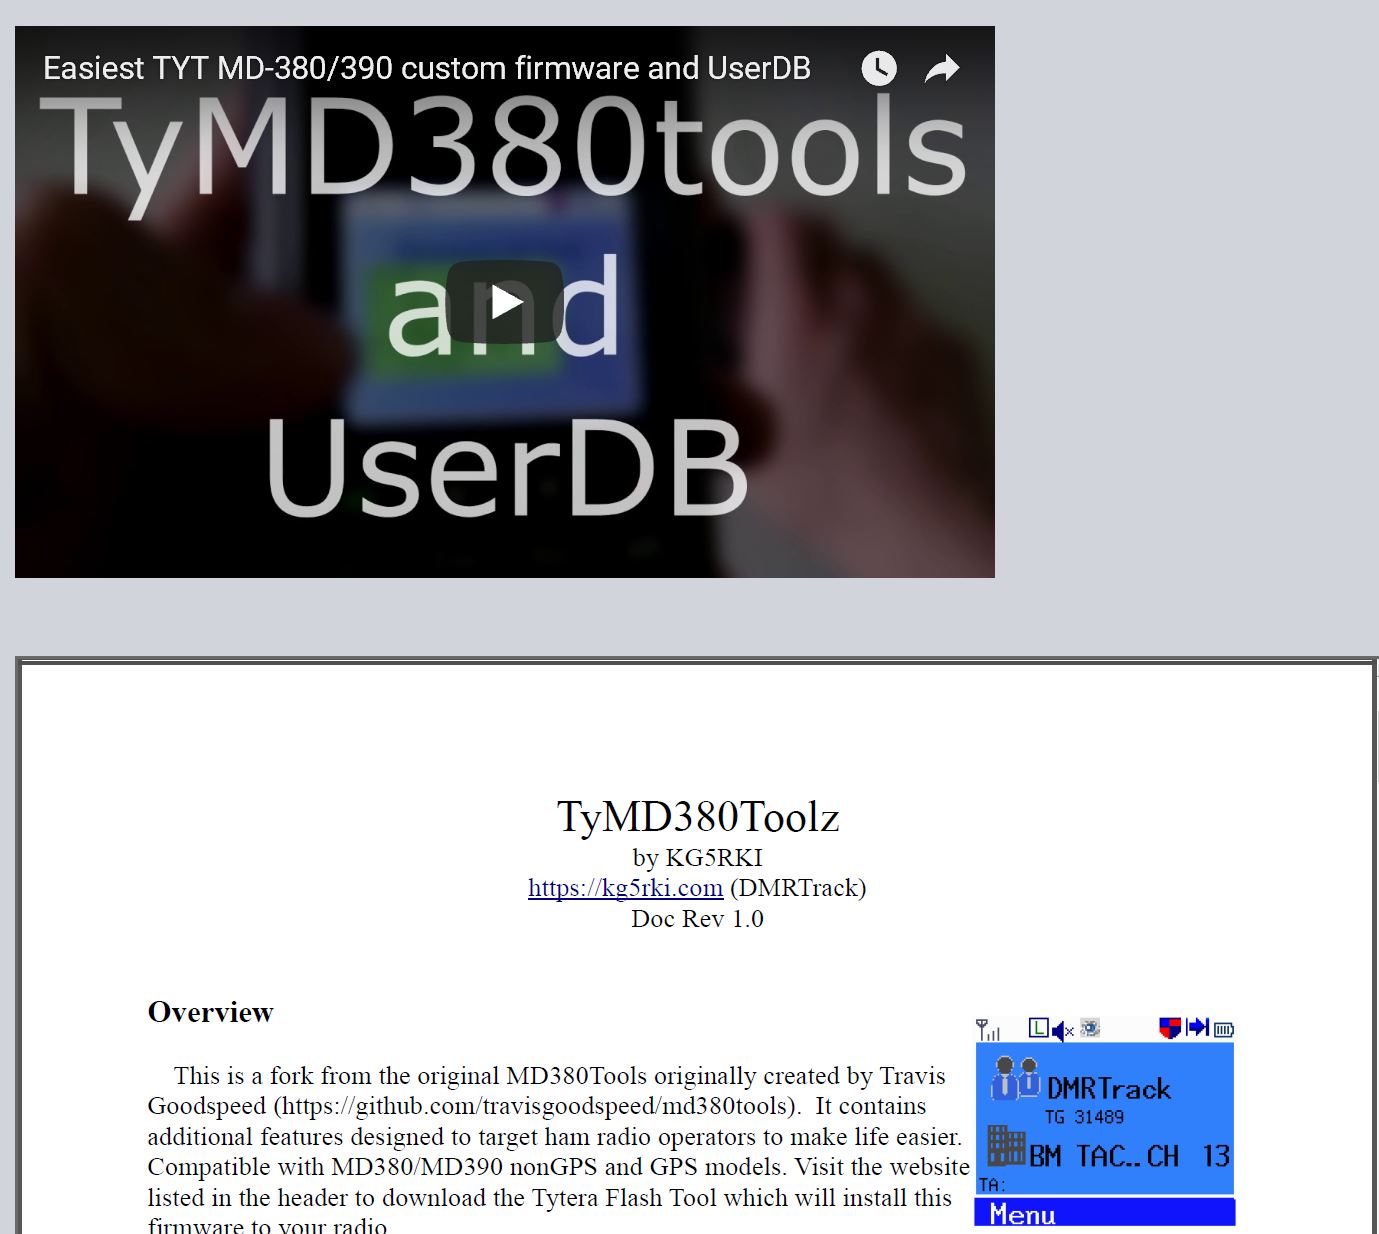
TyMD380Toolz
Alle informatie vind je hier!
Installing an OLED display on a MMDVM repeater
Bron: F5UII
After the article on the configuration and installation of a Nextion screen on a MMDVM repeater, let’s see together how to integrate a small OLED display on MMDVM.
This type of display is known by the reference SSD1306, it measures 27 millimeters for a display definition of 128 x 64. There are two variants of the SSD1306 display, one running on SPI bus and the other on I2C. I chose the I2C bus model, recognizable by these SCA and SCL pins. It is monochrome but also exists in a yellow and blue two-color version. Only the lines on the top of the display are yellow. This is the model I use.
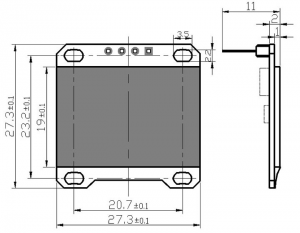
OLED SSD1306 display
Software prerequisites
You are connected to Raspberry Pi.
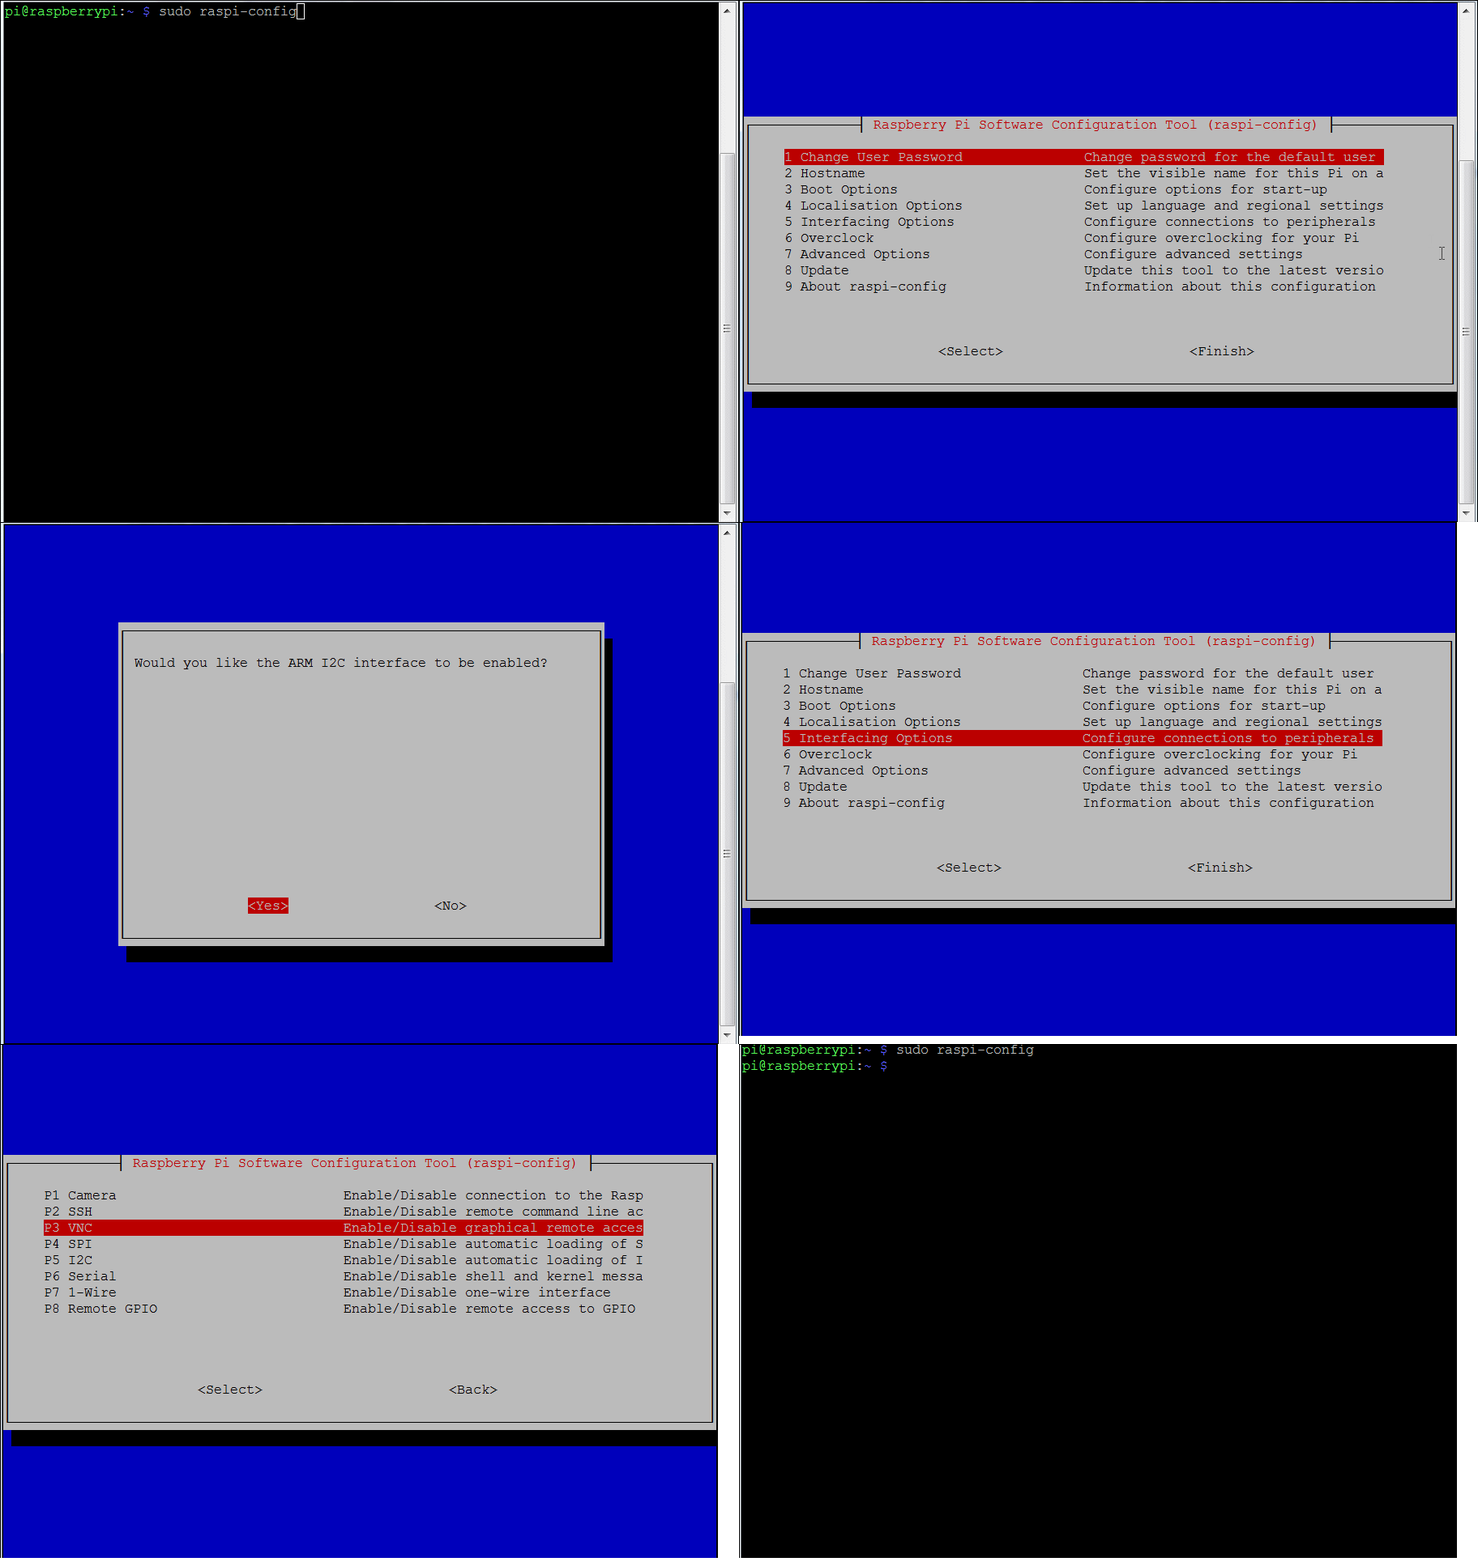
First of all, we will validate the SPI and I2C buses of the Raspberry Pi, thanks to the configuration menu.
|
1
|
sudo raspi–config
|
We now install software packages to manage these buses.
|
1
|
sudo apt–get install build–essential git–core libi2c–dev i2c–tools lm–sensors
|
In order for the modules to start we must indicated them in the modules file
|
1
|
sudo nano /etc/modules
|
You must have these two lines
|
1
2
|
i2c–dev
spidev
|
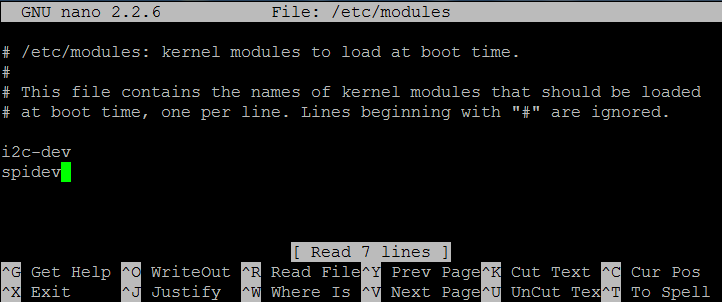
(Exit with Ctrl-X and Yes to save)
We restart the Raspberry Pi
|
1
|
sudo reboot
|
After reconnecting, we must find the ports i2c and spi
|
1
|
ls /dev/i2c*
|
|
1
|
ls /dev/spi*
|

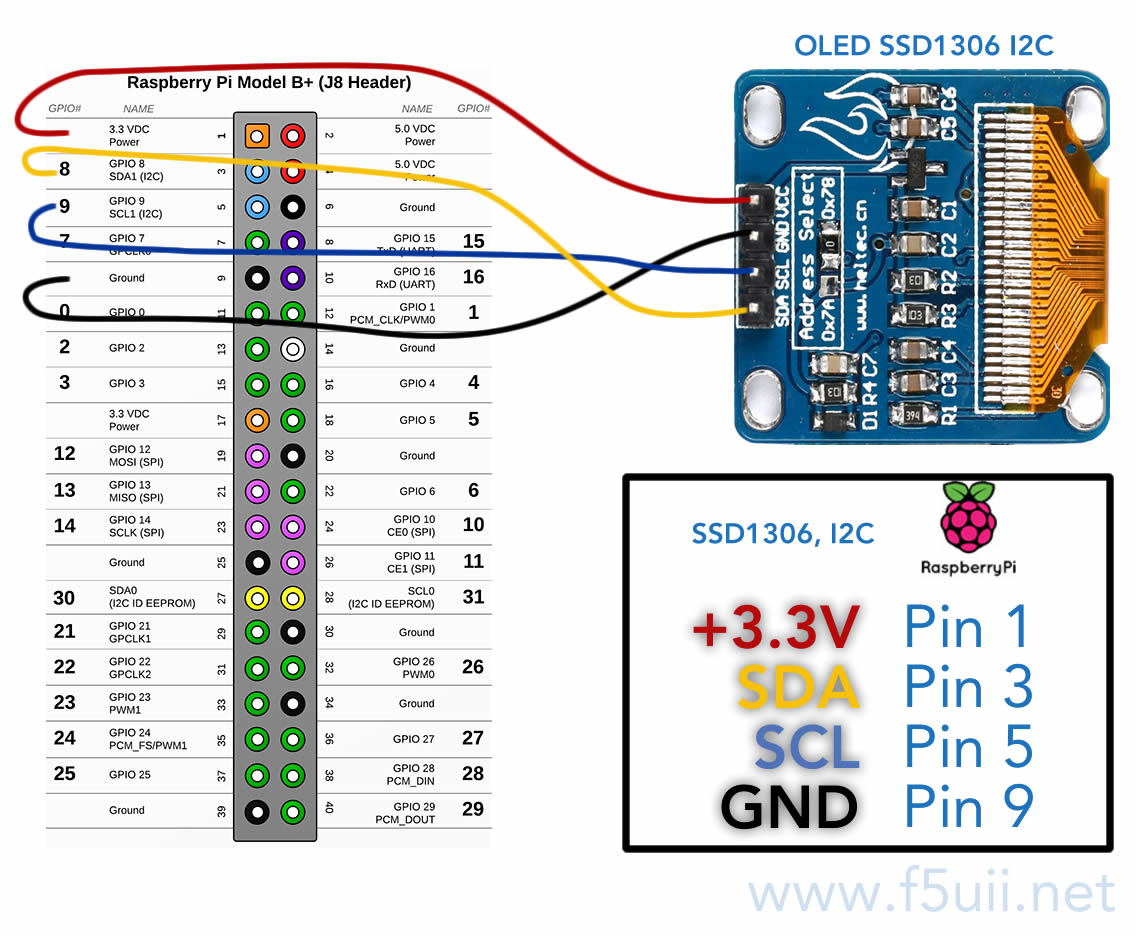
Connecting the Display
The SSD1306 is an I2C bus version. The connection is made as shown below.
Detection Test
We will check that the wiring is correct and that the screen is detected on the I2C bus.
Start the following command.
|
1
|
i2cdetect –y 1
|
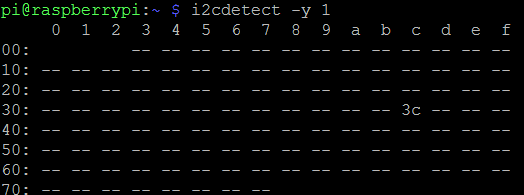
Equipment 3c appears. This is the SSD1306 screen.
Installing the OLED Display Communication Library
If you did not install git on your Raspberry Pi, I suggest you run this command.
|
1
|
sudo apt–get install git
|
Download now the ArduiPi_OLED library (directly on github).
|
1
|
git clone https://github.com/hallard/ArduiPi_OLED
|
then run the software compilation
|
1
2
|
cd ArduiPi_OLED
sudo make
|

Recompiling MMDVMHost
Let’s update MMDVMHost with these few instructions. The compilation will take several minutes.
|
1
2
3
|
cd /opt/MMDVMHost/
make clean
sudo make –f Makefile.Pi.OLED
|
|
1
2
3
4
5
6
7
8
9
10
11
12
13
14
15
16
17
18
19
20
21
22
23
24
25
26
27
28
29
30
31
32
33
34
35
36
37
38
39
40
41
42
43
44
45
46
47
48
49
50
51
52
53
54
55
56
57
58
59
60
61
62
63
64
65
66
67
68
69
70
|
pi@raspberrypi:/opt/MMDVMHost $ <strong>sudo make clean</strong>
rm –f MMDVMHost *.o *.d *.bak *~ GitVersion.h
pi@raspberrypi:/opt/MMDVMHost $ <strong>sudo make –f Makefile.Pi.OLED</strong>
echo “const char *gitversion = \”24358357e890a928f0053bcedd748123d7a6b9c2\”;” > GitVersion.h
g++ –g –O3 –Wall –std=c++0x –pthread –DOLED –I/usr/local/include –c –o AMBEFEC.o AMBEFEC.cpp
g++ –g –O3 –Wall –std=c++0x –pthread –DOLED –I/usr/local/include –c –o BCH.o BCH.cpp
g++ –g –O3 –Wall –std=c++0x –pthread –DOLED –I/usr/local/include –c –o BPTC19696.o BPTC19696.cpp
g++ –g –O3 –Wall –std=c++0x –pthread –DOLED –I/usr/local/include –c –o Conf.o Conf.cpp
g++ –g –O3 –Wall –std=c++0x –pthread –DOLED –I/usr/local/include –c –o CRC.o CRC.cpp
g++ –g –O3 –Wall –std=c++0x –pthread –DOLED –I/usr/local/include –c –o Display.o Display.cpp
g++ –g –O3 –Wall –std=c++0x –pthread –DOLED –I/usr/local/include –c –o DMRControl.o DMRControl.cpp
g++ –g –O3 –Wall –std=c++0x –pthread –DOLED –I/usr/local/include –c –o DMRCSBK.o DMRCSBK.cpp
g++ –g –O3 –Wall –std=c++0x –pthread –DOLED –I/usr/local/include –c –o DMRData.o DMRData.cpp
g++ –g –O3 –Wall –std=c++0x –pthread –DOLED –I/usr/local/include –c –o DMRDataHeader.o DMRDataHeader.cpp
g++ –g –O3 –Wall –std=c++0x –pthread –DOLED –I/usr/local/include –c –o DMREMB.o DMREMB.cpp
g++ –g –O3 –Wall –std=c++0x –pthread –DOLED –I/usr/local/include –c –o DMREmbeddedData.o DMREmbeddedData.cpp
g++ –g –O3 –Wall –std=c++0x –pthread –DOLED –I/usr/local/include –c –o DMRFullLC.o DMRFullLC.cpp
g++ –g –O3 –Wall –std=c++0x –pthread –DOLED –I/usr/local/include –c –o DMRLookup.o DMRLookup.cpp
g++ –g –O3 –Wall –std=c++0x –pthread –DOLED –I/usr/local/include –c –o DMRLC.o DMRLC.cpp
g++ –g –O3 –Wall –std=c++0x –pthread –DOLED –I/usr/local/include –c –o DMRNetwork.o DMRNetwork.cpp
g++ –g –O3 –Wall –std=c++0x –pthread –DOLED –I/usr/local/include –c –o DMRShortLC.o DMRShortLC.cpp
g++ –g –O3 –Wall –std=c++0x –pthread –DOLED –I/usr/local/include –c –o DMRSlot.o DMRSlot.cpp
g++ –g –O3 –Wall –std=c++0x –pthread –DOLED –I/usr/local/include –c –o DMRSlotType.o DMRSlotType.cpp
g++ –g –O3 –Wall –std=c++0x –pthread –DOLED –I/usr/local/include –c –o DMRAccessControl.o DMRAccessControl.cpp
g++ –g –O3 –Wall –std=c++0x –pthread –DOLED –I/usr/local/include –c –o DMRTrellis.o DMRTrellis.cpp
g++ –g –O3 –Wall –std=c++0x –pthread –DOLED –I/usr/local/include –c –o DStarControl.o DStarControl.cpp
g++ –g –O3 –Wall –std=c++0x –pthread –DOLED –I/usr/local/include –c –o DStarHeader.o DStarHeader.cpp
g++ –g –O3 –Wall –std=c++0x –pthread –DOLED –I/usr/local/include –c –o DStarNetwork.o DStarNetwork.cpp
g++ –g –O3 –Wall –std=c++0x –pthread –DOLED –I/usr/local/include –c –o DStarSlowData.o DStarSlowData.cpp
g++ –g –O3 –Wall –std=c++0x –pthread –DOLED –I/usr/local/include –c –o Golay2087.o Golay2087.cpp
g++ –g –O3 –Wall –std=c++0x –pthread –DOLED –I/usr/local/include –c –o Golay24128.o Golay24128.cpp
g++ –g –O3 –Wall –std=c++0x –pthread –DOLED –I/usr/local/include –c –o Hamming.o Hamming.cpp
g++ –g –O3 –Wall –std=c++0x –pthread –DOLED –I/usr/local/include –c –o OLED.o OLED.cpp
g++ –g –O3 –Wall –std=c++0x –pthread –DOLED –I/usr/local/include –c –o LCDproc.o LCDproc.cpp
g++ –g –O3 –Wall –std=c++0x –pthread –DOLED –I/usr/local/include –c –o Log.o Log.cpp
g++ –g –O3 –Wall –std=c++0x –pthread –DOLED –I/usr/local/include –c –o MMDVMHost.o MMDVMHost.cpp
g++ –g –O3 –Wall –std=c++0x –pthread –DOLED –I/usr/local/include –c –o Modem.o Modem.cpp
g++ –g –O3 –Wall –std=c++0x –pthread –DOLED –I/usr/local/include –c –o ModemSerialPort.o ModemSerialPort.cpp
g++ –g –O3 –Wall –std=c++0x –pthread –DOLED –I/usr/local/include –c –o Mutex.o Mutex.cpp
g++ –g –O3 –Wall –std=c++0x –pthread –DOLED –I/usr/local/include –c –o Nextion.o Nextion.cpp
g++ –g –O3 –Wall –std=c++0x –pthread –DOLED –I/usr/local/include –c –o NullDisplay.o NullDisplay.cpp
g++ –g –O3 –Wall –std=c++0x –pthread –DOLED –I/usr/local/include –c –o P25Audio.o P25Audio.cpp
g++ –g –O3 –Wall –std=c++0x –pthread –DOLED –I/usr/local/include –c –o P25Control.o P25Control.cpp
g++ –g –O3 –Wall –std=c++0x –pthread –DOLED –I/usr/local/include –c –o P25Data.o P25Data.cpp
g++ –g –O3 –Wall –std=c++0x –pthread –DOLED –I/usr/local/include –c –o P25LowSpeedData.o P25LowSpeedData.cpp
g++ –g –O3 –Wall –std=c++0x –pthread –DOLED –I/usr/local/include –c –o P25Network.o P25Network.cpp
g++ –g –O3 –Wall –std=c++0x –pthread –DOLED –I/usr/local/include –c –o P25NID.o P25NID.cpp
g++ –g –O3 –Wall –std=c++0x –pthread –DOLED –I/usr/local/include –c –o P25Utils.o P25Utils.cpp
g++ –g –O3 –Wall –std=c++0x –pthread –DOLED –I/usr/local/include –c –o QR1676.o QR1676.cpp
g++ –g –O3 –Wall –std=c++0x –pthread –DOLED –I/usr/local/include –c –o RS129.o RS129.cpp
g++ –g –O3 –Wall –std=c++0x –pthread –DOLED –I/usr/local/include –c –o RS241213.o RS241213.cpp
g++ –g –O3 –Wall –std=c++0x –pthread –DOLED –I/usr/local/include –c –o RSSIInterpolator.o RSSIInterpolator.cpp
g++ –g –O3 –Wall –std=c++0x –pthread –DOLED –I/usr/local/include –c –o SerialController.o SerialController.cpp
g++ –g –O3 –Wall –std=c++0x –pthread –DOLED –I/usr/local/include –c –o SerialPort.o SerialPort.cpp
g++ –g –O3 –Wall –std=c++0x –pthread –DOLED –I/usr/local/include –c –o SHA256.o SHA256.cpp
g++ –g –O3 –Wall –std=c++0x –pthread –DOLED –I/usr/local/include –c –o StopWatch.o StopWatch.cpp
g++ –g –O3 –Wall –std=c++0x –pthread –DOLED –I/usr/local/include –c –o Sync.o Sync.cpp
g++ –g –O3 –Wall –std=c++0x –pthread –DOLED –I/usr/local/include –c –o TFTSerial.o TFTSerial.cpp
g++ –g –O3 –Wall –std=c++0x –pthread –DOLED –I/usr/local/include –c –o Thread.o Thread.cpp
g++ –g –O3 –Wall –std=c++0x –pthread –DOLED –I/usr/local/include –c –o Timer.o Timer.cpp
g++ –g –O3 –Wall –std=c++0x –pthread –DOLED –I/usr/local/include –c –o UDPSocket.o UDPSocket.cpp
g++ –g –O3 –Wall –std=c++0x –pthread –DOLED –I/usr/local/include –c –o UMP.o UMP.cpp
g++ –g –O3 –Wall –std=c++0x –pthread –DOLED –I/usr/local/include –c –o Utils.o Utils.cpp
g++ –g –O3 –Wall –std=c++0x –pthread –DOLED –I/usr/local/include –c –o YSFControl.o YSFControl.cpp
g++ –g –O3 –Wall –std=c++0x –pthread –DOLED –I/usr/local/include –c –o YSFConvolution.o YSFConvolution.cpp
g++ –g –O3 –Wall –std=c++0x –pthread –DOLED –I/usr/local/include –c –o YSFFICH.o YSFFICH.cpp
g++ –g –O3 –Wall –std=c++0x –pthread –DOLED –I/usr/local/include –c –o YSFNetwork.o YSFNetwork.cpp
g++ –g –O3 –Wall –std=c++0x –pthread –DOLED –I/usr/local/include –c –o YSFPayload.o YSFPayload.cpp
g++ AMBEFEC.o BCH.o BPTC19696.o Conf.o CRC.o Display.o DMRControl.o DMRCSBK.o DMRData.o DMRDataHeader.o DMREMB.o DMREmbeddedData.o DMRFullLC.o DMRLookup.o DMRLC.o DMRNetwork.o DMRShortLC.o DMRSlot.o DMRSlotType.o DMRAccessControl.o DMRTrellis.o DStarControl.o DStarHeader.o DStarNetwork.o DStarSlowData.o Golay2087.o Golay24128.o Hamming.o OLED.o LCDproc.o Log.o MMDVMHost.o Modem.o ModemSerialPort.o Mutex.o Nextion.o NullDisplay.o P25Audio.o P25Control.o P25Data.o P25LowSpeedData.o P25Network.o P25NID.o P25Utils.o QR1676.o RS129.o RS241213.o RSSIInterpolator.o SerialController.o SerialPort.o SHA256.o StopWatch.o Sync.o TFTSerial.o Thread.o Timer.o UDPSocket.o UMP.o Utils.o YSFControl.o YSFConvolution.o YSFFICH.o YSFNetwork.o YSFPayload.o –g –O3 –Wall –std=c++0x –pthread –DOLED –I/usr/local/include –lArduiPi_OLED –lpthread –o MMDVMHost
pi@raspberrypi:/opt/MMDVMHost $ sudo reboot
|
Updating the MMDVMHost Configuration File
Here is the final step. Now, in the [General] section of the MMDVM.ini file, we have installed an OLED screen
|
1
|
sudo nano /opt/MMDVMHost/MMDVM.ini
|
|
1
2
3
4
5
6
7
8
9
10
11
|
[General]
Callsign=F5ZKS
Timeout=600
Duplex=1
# ModeHang=10
RFModeHang=10
NetModeHang=3
#Display=Nextion
Display=<strong>OLED</strong>
#Display=None
Daemon=0
|
It refers to the OLED section that we do not have to change
|
1
2
3
4
|
[OLED]
Type=3
Brightness=0
Invert=0
|
Finally, we need to restart the Raspberry Pi
|
1
|
sudo reboot
|
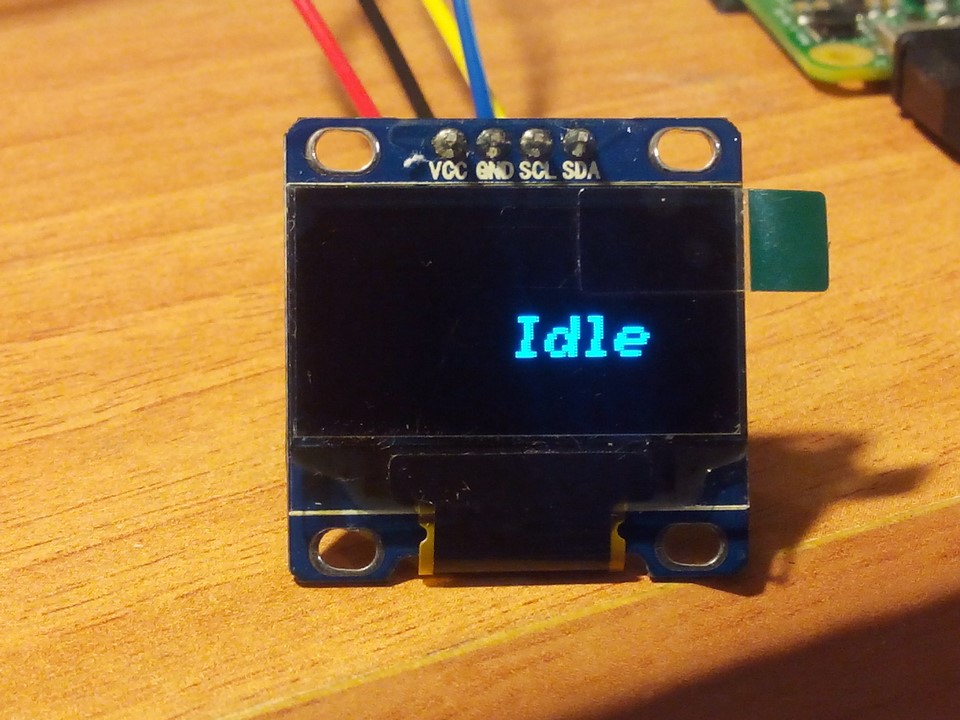
Result
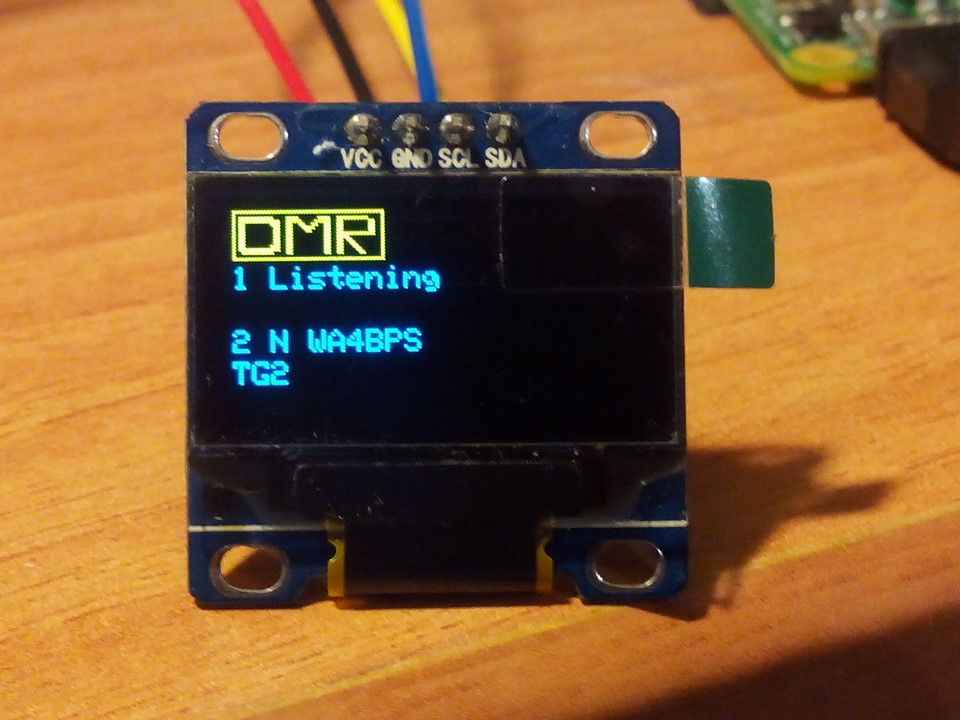
The display SSD1306 lights up. It is waiting for traffic


